Wednesday, June 24, 2009

Encaustic on Wood

"AFFORDABLE REAL ESTATE" is the name of the class that Denise Kelly and Linda Moore are teaching at Stamping Details on Saturday, August 22.

The Real Estate Houses

The reason I mention this is that myself and five other artist friends of Denise and Linda had a terrific play day at Linda's home.

Deborah, Denise, Debi, Laura
Sally and Linda

August will be the first time they are going to be teaching this class and wanted a "dress rehearsal" to make sure they didn't miss anything when they teach the class. There were so many different treasures to enhance our little houses. Obviously they had been out scavenging the local junk and vintage (used?) hardware stores. Who knows where all they had been, but the selections was great. Everything was provided. We didn't need to bring anything unless we truly had something specific we wanted to use.

In my case, I had no idea what we were going to be doing. My creativity didn't start until I saw the wonderful samples.

Sally's House

My project developed slowly with the painting taking me the most time to get what I wanted.

My final touch was the addition of black buttons of different sizes on the side of my roof. It needed a little texture.

What to put in my windows? Linda brought over a miniature Sear's Catalog and started flipping through it and came up this page of undergarments for men and women. I thought the size of the heads would be fine and then I had a light bulb moment. The two women were posed perfectly to be sitting on my window sills and there was one woman standing. Yes! Then I decided the woman standing need to have a key over her arm. Linda rushed into her organized stash and brought out many different choices but kept saying "this one is good but wait." Her last choice was the one I used and she knew it would be the best choice. Thank you, Linda.

"Happy Mistake" on the roof

I did have a "happy accident." I first painted my room an eggplant color. Then I decided to use a Lumiere to jazz it up a little. That was to slick so I made a wash out of some craft orange paint. Finally I was using some black oil crayons and rubbing that in to get a smokey affect when the Lumiere started lifting. I ended up pushing the skin of the paint around until I formed a keyhold shape that showed my original paint with a little flower peaking out from below all those layers that I obviously had let dry completely before adding addition paint. OH, well. Lucky me. I love this little key hole in my roof.

With all of us sitting around the tables it was so interesting how our minds all went in a different directions. Everyone was helpful and offered suggestions when asked. Very friendly atmosphere.

Deborah was finished first! She said that was because she has done this before. The hardware she used and the way she used it was so bold. She helped me with the oil crayons and how to use them to bring more interest to my background.

Laura's House

Laura had come with her idea ready to execute. She was making a "house of cards." She cut up some playing cards and used them as a stencil that she adhered.

Georgia's House
(unfinished)


Georgia came with some things from home but get hers completely finished. She said she had more things at home to add. Can't wait to see the finished project.

Debi's House

Debi went with her favorite colors and "Debified" her house. The numbers that started out silver she colored with alcohol inks. Her colors are so yummy and happy.

Denise's House

Denise was almost done with her painting when she decided she didn't like it at all and started all over. I don't know if you can see the door nob and realize that it is covered in wax and ended up looking like a bird's egg. She certainly achieved success with her finished project!

Linda's House (unfinished)

And then there is Linda's house that went to the fishes! Spectacular. It's hard to see how wonderful this house looks in the picture. There is copper scrubber that was pulled apart and fits like a nylon over the wood panel. Then there is cheese cloth(?) that had been dyed and attached. The wood itself and the roof look wonderful in person. And then there are all the little charms that she sewed onto the netting.

The final touch to our work was the application of encaustic wax. I had only once used this before - a long time ago at Georgia's. I remembered nothing. . . Linda and Denise gave excellent directions as to how to apply and work with it after you covered your entire board with the wax. And then you polish this wax with a shop cloth. Deborah's house glowed from her polishing.

You will love this class and it's teachers. But, what you will miss when you take this class at Stamping Details is the wonderful lunch Linda provided for us and the setting in her patio where we ate lunch and took a break. What a wonderful host and hostess she and her husband are. Yes, Wayne was there also and we all wanted to borrow him in our home to do various and a sundry things. The man has neat and organized down to a science. . .

Thank you Denise and Linda for inviting me to play at your home.

Saturday, June 20, 2009

Queen for a Day!


Elena of SCRAPBOOK ROYALTY had a party for her Volunteers at the PAPER SOURCE. They had a contest where everyone voted who should be crowned QUEEN.


Guess who won?

Queen for a Day


We had such a GREAT TIME. The management went all out with the make-n-takes had set up for all of us. Plus, they took us on a tour of everything they have and offer at the PAPER SOURCE.

Sally, Elena and Kat

After the party, a lot of the group went to BUCCO DE BEPPO for dinner family style. Elena being the hostess with the most-est had pre-ordered the meal.YUMMY!

I had to decline. Twice in one week being temped by large portions of delicious food while on my diet, was just too must for me. SOON, I'll be able to go out and eat anything as long as I watch my portions and my over-all in take of carbs. WAHHHH.


Volunteers and their Leader

Sally and Georgia

Sandy and Debbie

Thursday, June 18, 2009

New Background and Banner

Well, Jackie found a new place for backgrounds and so I visited and loved them. After choosing a new background, my banner was way to bright. So, PhotoShop to the rescue.

I had taken a bunch of random shots of things (Garden Art, etc.) in my garden a couple of weeks ago. So I started playing around and in no time came up with my new banner.

The banner is composed of three different photos - the background and two items I extracted from other photos (the bird house and the rabbit). I then had to change the hue to go with my new background.

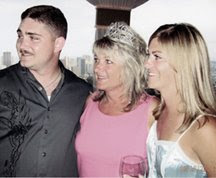
I think it all looks great - but it is not really me - way to calm, but more pleasing to view. Now what do I do with the photo of me and my two kids - way to bright. Maybe posterize us? Then there is the side banner which states "Family is Everything." Also the wrong hue of pink.

Check out the new place to get backgrounds. They are awesome. Just click on the subtle ad up in the left corner to go to their website or this link. I believe on this site she states she is a artistdesigner from Finland living in Los Angeles. Her name is Itkupilli! Check out her website and all she has to offer.

While Jackie was fooling around, she helped Georgia and her blog and now Georgia has a cook background that I just love and a banner. Jackie is the best!

Wednesday, June 3, 2009

FAIRY PAPER DOLL SWAP

Miss Turquoise Fairy


With all the talk of paper dolls, Elena of Scrapbook Royalty and The Traveling Princess blog decided to host her own small paper doll swap. And since it was "her" swap, she picked the subject and the players. There were six of us. What made it so interesting is that each one of us had not met nor knew at least one other artist in the group. (Please visit Elena's blog with the link above to read the various techniques each artist used to create their fairies).


Back: Pat, Georgia and Sally
Front: Diane, Elena and Carrie

On Tuesday we met at Milton's in Del Mar for lunch. Georgia had reserved us a table and we chatted and ate our lunches. Then began the exchanges. They were wonderful. The best part always with theses exchanges is that they are all so different. We had such a good time and met new people for the first time under the best of circumstances. It was a "win - win" for all!

The Dolls and their creators

So, Georgia, Pat, Carrie, Elena, Diane and myself had a month to create six paper dolls. The only criteria is that they should not be more than 10 inches tall over all.

Georgia's Fairy


Carrie's Fairy


Pat's Fairy


Diane's Fairy


Elena's Fairy


TENsecond Studio

What influenced my paper dolls? Well, Jlo (Jen Lowe) had just been out here teaching from Colorado and I had taken her TENseconds studio giant paper doll class. TENseconds studio provides a giant 1/4 thick form that includes head, hair, arms, body and legs. Jlo gave us the metal and taught those who didn't know how to emboss the technique.

Sally's TENsecond studio doll
Stands 18 inches

I had already taken a class up at The Art Bar in Santa Ana from the owner and fell immediately in love with metal and all you can do with it. That year, I had made 20 ornaments for my trees with a pattern from Christine Adolph's snowflake stamp.

The Process using the Pazzles

So, not remembering the KISS mantra, I embarked on my small paper dolls. Jlo had already made a Fairy pattern for a little girl in her class. I took that pattern and made it a lot smaller and scanned the line drawing into my Pazzles and did the auto trace.


12x12 cardboard cut by Pazzles

Now I got my cardboard (used the cardboard that is in the 12 x 12 packets of scrapbook paper). The Pazzles cut out all the pieces after I figured out the depth of the blade and the pressure needed. I then spray painted all the backs of the body parts with pink.
Pazzle cutting Humogus TENsecond studio adhesive


Now, I put the 8 x 10 Red Line sheets of the stickiest two sided tape in my Pazzles and they cut out the patterns again.

Pazzle cutting TENsecond studio metal sheets


Next came the metal for the Pazzles to cut. In hind sight, the only thing wrong I did with the metal was I should have made it a little bigger because it shrinks when you emboss it.

The embossing was fun. I used some forms and also did some free style embossing.

Now I had to put all the pieces together, meaning attach the tape to the cardboard and then the metal to the tape and hope I could line it all up correctly, The tape is un-forgiving because it is SO STICKY!

Now the sanding of the embosses areas on everything. Pretty messy but looks great after wards.

Miscellaneous Pieces

Jlo had also introduced me to Copic Markers and the aerosol can. I now started to color my little girls.

While I was in the midst of all this, the Del Mar Scrapbook Expo came. While at the Expo my friends noticed that their was a craft fair also going on next door. I had been thinking about dressing my girls and there for $3 I found a bag of mainly pink but one multi colored hair crunchy. I grabbed them and cut the band and pulled ribbon through them to make the skirts.

I needed a face for my fairy. In Jlo's class, you just embossed the metal and put eyes if you wanted or just a design. I didn't want that for my girls. So, I used my cousin in Poland, George's mother's beautiful face for my fairies. I colored her face a little with a copic marker and colored pencils.

While I was at the Craft Fair mentioned above, there was a lady with junk jewelry for sale. After you gathered your pieces she told you how much it was. What I bargain and some of the pieces ended up as necklaces on my fairies.

More of my fairies